How To Remove Acrylic Nails Safely At Home
Feeling like it’s time for a fresh start with your nails? Maybe your beautiful acrylic set has seen better days, or perhaps you're just ready for a change. Learning how to remove acrylic nails at home can feel a bit daunting, yet with the right approach and a little patience, it’s actually quite straightforward. Many folks, you know, wonder if they can really do this themselves without a trip to the salon, and the good news is, you absolutely can. We’ve put together a handy guide to help you free your fingers at home, making the process smooth and kind to your natural nails.
There are, in fact, several ways to take off acrylic nails, and some are much gentler than others. Our focus here is on methods that prioritize the health of your natural nails underneath. We’ll walk you through the steps that experts suggest, so you can avoid common mistakes and keep your nails looking their best. It's really about giving your hands the care they deserve, and doing it in a way that feels good and safe, too it's almost.
This article will, in a way, show you how to remove acrylic nails with acetone, along with touching on other methods like dental floss and even an electric nail filer for those who are more experienced. You’ll learn how to (and how not to) remove acrylic nails at home, ensuring a safe and quick removal process. Read on to discover the easy and safe methods that can save you a trip to the salon and keep your nails strong, you know, for whatever comes next.
- A Court Of Shaded Truths
- How Long Does It Take For Eyelashes To Grow Back
- Taper Fade Black Men
- Sophie Rain Spiderman Video
- Niece In Spanish Language
Table of Contents
- Why Taking Off Acrylic Nails Matters
- Getting Ready for Acrylic Nail Removal
- Step-by-Step Guide to Acetone Removal
- Exploring Other Removal Methods
- Common Mistakes to Avoid
- Frequently Asked Questions About Acrylic Nail Removal
Why Taking Off Acrylic Nails Matters
Taking care of your nails means knowing when to say goodbye to your acrylics, you know. It’s not just about aesthetics; it's very much about keeping your natural nails healthy underneath. Leaving acrylics on for too long, or removing them improperly, can lead to some pretty uncomfortable issues. You want your nails to breathe and stay strong, so a proper removal process is, in some respects, a gift to your hands. It helps prevent damage and keeps them looking their best for future styles, actually.
Proper removal really makes a difference for the long-term health of your nails. When you take them off the right way, you avoid weakening your natural nail plate or causing any painful lifting. It’s a bit like giving your nails a fresh start, allowing them to recover and grow without any extra stress. This attention to detail, you know, helps maintain their strength and appearance, which is pretty important for anyone who loves having beautiful hands.
So, understanding how to remove acrylic nails safely is a skill that pays off. It means you’re in control of your nail health, rather than leaving it to chance. Plus, it’s quite empowering to know you can manage this at home, saving time and money. It’s a simple act of self-care that, in a way, shows your nails you appreciate them, and that’s a good feeling, too it's almost.
- Eminence In Shadow Season 3
- Do A Barrel Barrel Roll
- How Many Children Does Pam Bondi Have
- In The Clerb We All Fam
- Securely Connect Remote Iot Vpc Raspberry Pi Download Windows Free
Knowing When to Remove Them
Knowing the right time to remove your acrylic nails is, you know, pretty important for preventing problems. Mazz Hanna, a CEO in the beauty industry, points out that acrylic nails should be removed when you notice lifting, chipping, or peeling. These issues aren't just cosmetic; they can actually trap moisture underneath the acrylic, which can unfortunately lead to fungal infections. So, keeping an eye out for these signs is a really smart move, in fact.
If you see any gaps forming between your natural nail and the acrylic, that’s a clear signal it’s time for removal. Chipping along the edges or peeling from the nail bed also indicates that the bond is breaking down. Ignoring these warning signs could mean inviting moisture and bacteria to settle in, creating an environment where infections might thrive. It’s a situation you, quite frankly, want to avoid for your nail health, so.
Paying attention to these visual cues helps you protect your nails and keep them healthy. It’s a proactive step that prevents small issues from becoming bigger, more painful ones. So, if your acrylics are showing any of these signs, consider it your cue to start the removal process. Your natural nails will definitely thank you for that care, you know, for sure.
Getting Ready for Acrylic Nail Removal
Before you even think about touching your acrylics, getting everything ready is, like, half the battle, you know. It’s all about setting yourself up for success and making the process as smooth as possible. Having all your tools and protective items within reach means you won’t have to stop midway through, which can be pretty annoying. A little preparation goes a very long way in ensuring a safe and effective removal, actually.
Think of it as preparing your little nail spa at home. You want a clean, well-lit area where you can comfortably work without distractions. Laying down some old towels or newspaper is a good idea, too, because things can get a little messy with acetone. This initial setup really helps you stay focused and keeps your workspace tidy, making the whole experience much more pleasant, in fact.
Taking these few moments to get organized can prevent frustration and potential mishaps. It’s about creating an environment where you can relax and concentrate on the task at hand, which is, you know, pretty important when dealing with something like nail removal. So, grab your supplies, find a good spot, and get ready to give your nails some attention, actually.
Gathering Your Supplies
To start your acrylic nail removal journey, you’ll need a few key items, you know, to make things easy and effective. First, grab some nail clippers; these will help you trim down the length of your acrylics, making them more manageable. Next, a good quality nail file is pretty essential for filing down the topcoat and some of the acrylic material. You want something that can do the job without being too harsh, you know.
The star of the show for many removal methods is 100% acetone. This is what helps dissolve the acrylic. You'll also need a good supply of cotton balls or cotton pads, and some aluminum foil cut into small squares. These items work together to create a little soaking environment for each nail, which is actually pretty clever. Having these ready means you won't have to scramble mid-process, which is good, you know.
Beyond the basics, you might also want a wooden cuticle pusher or an orange stick for gently nudging off the softened acrylic. A bowl for soaking, if you choose that method, is also a must-have. Lastly, don't forget some cuticle oil and hand cream for aftercare; your nails will definitely appreciate the hydration. Having everything laid out, you know, just makes the whole thing flow better, really.
Protecting Your Skin
Before you even think about soaking your nails, it’s, like, super important to protect the skin around them, you know. Acetone is really effective at breaking down acrylics, but it can also be very drying and harsh on your skin. So, creating a barrier is a crucial step to keep your skin from getting irritated or overly dry. This little bit of effort now saves you from discomfort later, actually.
A simple yet very effective way to do this is to apply petroleum jelly around your nail beds. Just take a small amount and gently spread it on the skin surrounding each nail, making sure not to get any on the acrylic itself. This creates a protective layer that helps shield your skin from the acetone, which is pretty smart, you know. It’s a small step that makes a big difference in how your hands feel after the removal process.
This protective layer acts as a kind of shield, preventing the acetone from directly touching and drying out your delicate skin. It’s a simple trick, but it really helps maintain the moisture and health of your cuticles and fingertips. So, don't skip this part; your skin will definitely thank you for that little bit of extra care, you know, for sure.
Step-by-Step Guide to Acetone Removal
Removing acrylic nails with acetone is, in a way, the most common and often recommended method, you know, by experts. It’s a process that requires patience, but it’s very effective when done correctly. We’re going to walk through each step, making sure you understand how to do it safely and without causing any harm to your natural nails. This method is all about gently dissolving the acrylic, rather than forcing it off, which is key, you know.
Many people find this approach to be the least damaging, as long as you follow the instructions carefully. It involves a bit of soaking, a bit of waiting, and then some very gentle nudging. The goal is to let the acetone do its job, softening the acrylic until it can be easily removed. It's a method that, frankly, respects the integrity of your natural nails, which is pretty important, actually.
So, get ready to transform your nails back to their natural state with this expert-approved technique. It might take a little time, but the results—healthy, undamaged natural nails—are definitely worth the effort. This is, you know, how to remove acrylic nails the right way, according to many pros, so.
Preparing the Nails
The first step in getting those acrylics off is, you know, to prepare your nails properly. This really sets the stage for a smooth removal. You’ll want to grab those nail clippers first and trim down the length of your acrylic nails as much as you comfortably can. The shorter they are, the less material there is for the acetone to work through, which can save you some time, actually.
Next, you need to file the surface of your acrylic nails to remove the topcoat. This isn't about filing down to your natural nail; it's just about breaking through that shiny, protective layer. This allows the acetone to penetrate the acrylic more effectively, which is pretty important for the soaking process. You can use a coarse nail file for this part, just making sure to get rid of all the shine, you know.
After filing, remember that crucial step of applying petroleum jelly around your nail beds to protect your skin. This creates a barrier against the drying effects of the acetone. These initial preparations are, in a way, like getting ready for a big project; they ensure everything goes according to plan. So, take your time with these steps; they truly matter for a good outcome, you know.
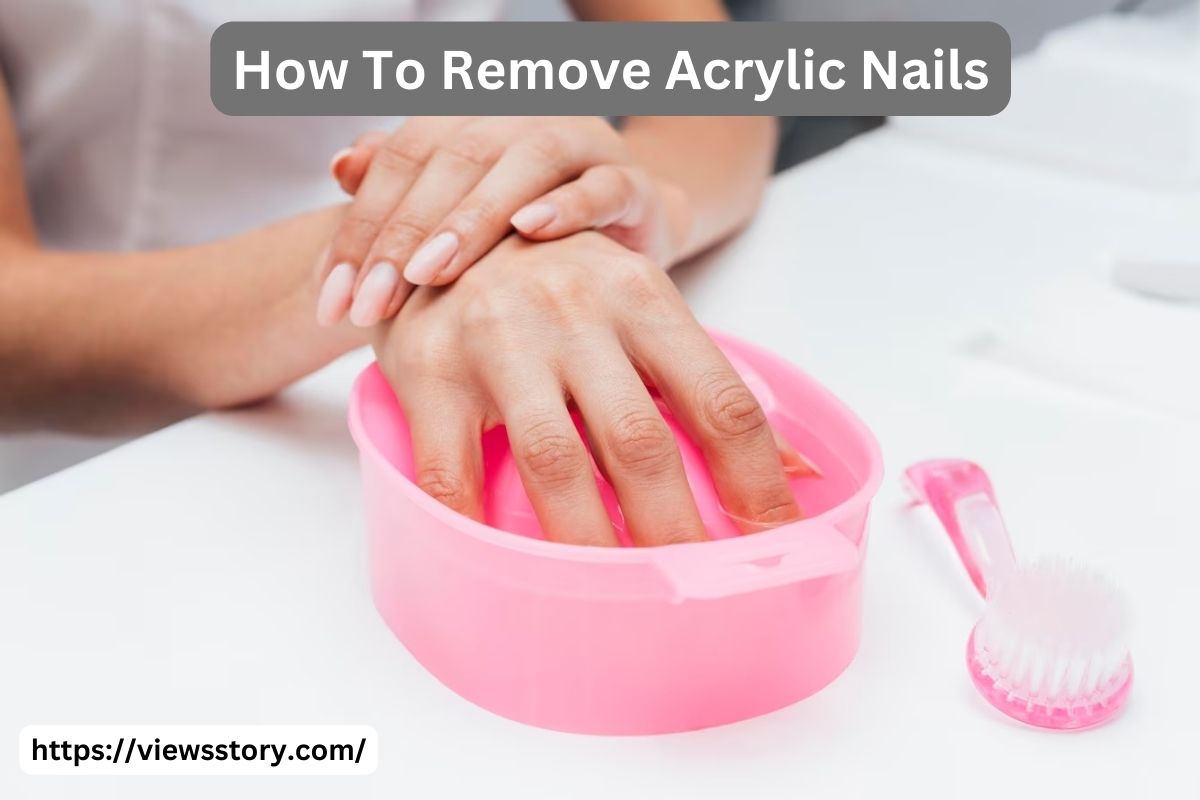
The Soaking Process
Now comes the main event for how to remove acrylic nails: the soaking process. This is where the acetone really gets to work, you know, softening up those acrylics. There are a couple of popular ways to do this, and both are pretty effective. The key is to ensure your nails are fully exposed to the acetone for a good amount of time, which is actually very important.
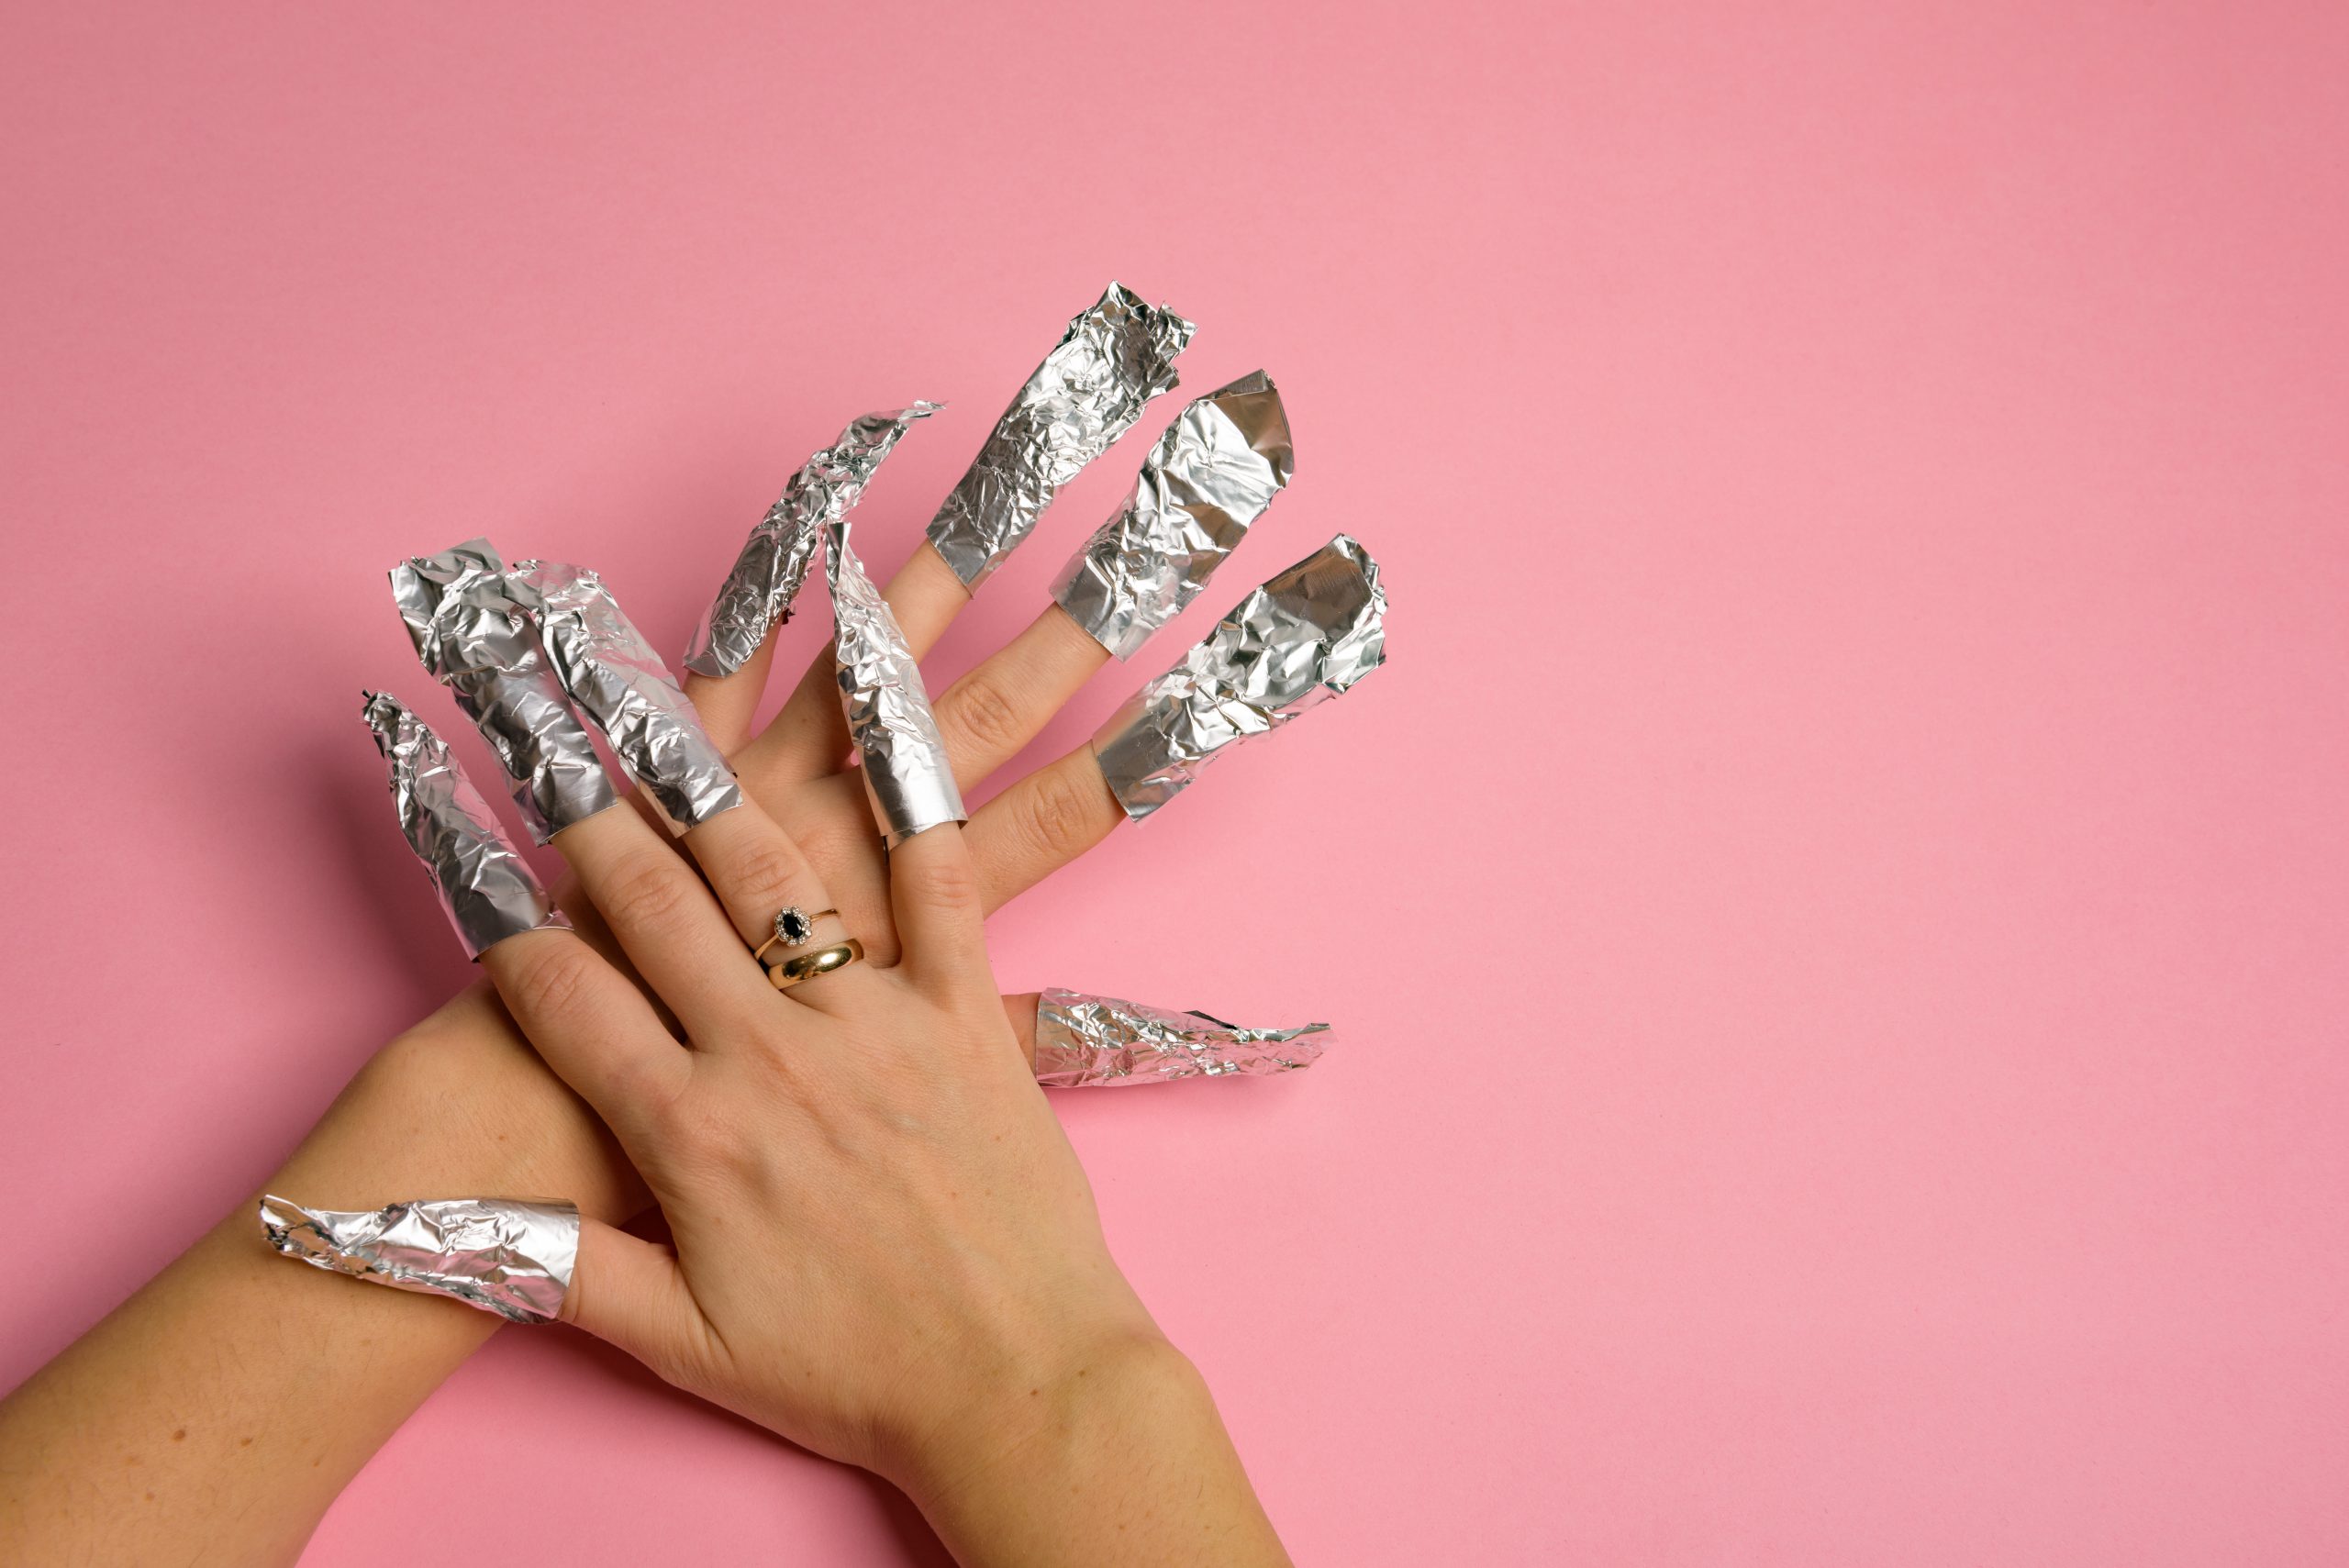
One common method involves soaking cotton balls in 100% acetone and placing one directly on top of each acrylic nail. Once the cotton ball is in place, you then wrap each finger tightly with a small piece of aluminum foil. This foil helps to hold the cotton ball in position and, more importantly, keeps the acetone from evaporating too quickly. You want to make sure each nail is, like, snugly wrapped, you know.
Another option is to fill a bowl with acetone and simply soak your fingertips directly in it. If you choose this method, you might want to place the bowl inside a larger bowl of warm water to create a double boiler effect, which can speed up the process a little. Whichever method you pick, you’ll typically need to let your nails soak for about 20-30 minutes. You'll start to see the acrylic softening and lifting, which is a good sign, you know.
Gentle Removal
After your nails have had a good soak, the gentle removal part of how to remove acrylic nails begins, you know. This step is all about patience and avoiding any harsh pulling or prying, which can really damage your natural nails. Once you remove the foil and cotton from one finger, you should see the acrylic looking soft, almost gooey, and perhaps even lifting away from your natural nail, which is pretty cool, actually.
Using a wooden cuticle pusher or an orange stick, very gently try to push the softened acrylic off your nail. It should, ideally, come off quite easily. If it doesn't, or if you feel any resistance, don't force it. That’s a clear signal that it needs more soaking time. You might need to re-soak that nail with a fresh acetone-soaked cotton ball and foil for another 10-15 minutes, you know, to give it more time to break down.
Work on one nail at a time, removing the softened acrylic and then moving to the next. Some areas might be more stubborn than others, and that's perfectly normal. The goal is a clean, gentle removal, so take your time and be kind to your nails. Once the bulk of the acrylic is off, you can gently buff away any remaining small pieces with a fine-grit nail buffer. This really helps smooth things out, you know, for a nice finish.
Aftercare for Your Natural Nails
Once all the acrylic is off, your natural nails might feel a little sensitive and, you know, look a bit dry. This is totally normal, as acetone can be pretty dehydrating. So, the aftercare is a very important part of how to remove acrylic nails, helping your nails recover and get back to their best. It’s all about replenishing moisture and giving them some much-needed nourishment, actually.
Start by washing your hands thoroughly to remove any lingering acetone residue. Then, apply a generous amount of cuticle oil to your nail beds and cuticles. Gently massage it in; this helps hydrate the skin and strengthens the nail plate. You can also use a rich hand cream or lotion all over your hands to combat any dryness. This step is, in a way, like giving your nails a big drink of water, you know.
Consider giving your nails a break from any polish or new enhancements for a week or two. This allows them time to breathe and regain their natural strength. You might also want to apply a nail strengthener or a clear protective coat to help them along. Regular moisturizing and gentle care will, you know, really help your nails bounce back beautifully, for sure.
Exploring Other Removal Methods
While acetone soaking is, you know, generally the go-to for how to remove acrylic nails, some people wonder about other options. It’s true that there are a couple of alternative methods floating around, but it’s really important to approach these with a lot of caution. Not all methods are created equal, and some can be much harsher or even damaging to your natural nails if not done correctly, you know.
Our text mentions dental floss and an electric nail filer as possibilities, and these definitely require a different skill set and a clear understanding of the risks involved. It’s not just about getting the acrylic off; it’s about doing it without causing pain or long-term damage. So, if you’re considering these, you know, really think about whether you have the experience and patience needed, actually.
The goal is always to protect your natural nails. While curiosity about different techniques is natural, sticking to proven, gentle methods is often the wisest choice. If you do explore alternatives, make sure you're very well-informed and proceed with the utmost care. Your nail health is, in some respects, pretty important, you know.
The Dental Floss Approach (with caution)
The dental floss method for how to remove acrylic nails is, you know, one that you often hear about, but it really needs to be approached with extreme caution. This technique involves using dental floss to "saw" the acrylic off your natural nail. It typically requires two people: one to hold the acrylic nail up slightly and the other to carefully slide the floss underneath. It sounds simple, but it can be very risky, actually.
The main danger with this method is the potential for serious damage to your natural nail bed. If the floss is pulled too quickly or with too much force, it can rip off layers of your natural nail, causing pain, thinning, and even bleeding. It’s a bit like trying to force something that isn't ready to come off, which is, you know, never a good idea when it comes to your body. So, you really need to be gentle, if you even attempt this, actually.
Many experts, in fact, advise against using dental floss for acrylic removal due to the high risk of injury. While it might seem like a quick fix, the potential for harm to your natural nails and the discomfort involved often outweigh any perceived benefits. If you’re considering this, you know, think very carefully about the possible consequences for your nail health, for sure.
Using an Electric Nail Filer (for experienced hands)
Using an electric nail filer for how to remove acrylic nails is, you know, a method that professionals often use, but it’s really not for everyone. It requires a lot of skill and a very steady hand, because you’re essentially grinding down the acrylic material. If you're not experienced, you could easily file into your natural nail, causing thinning, heat damage, or even injury, which is pretty serious, actually.
An electric nail filer, sometimes called a nail drill, can remove acrylic quickly, but precision is key. You need to know which bits to use, at what speed, and how much pressure to apply. Filing too aggressively can create friction heat, which can be very uncomfortable and even burn your nail bed. It's a tool that, frankly, demands respect and proper training to use safely, you know.
Unless you have professional experience or have been properly trained, it's generally best to avoid using an electric nail filer for at-home acrylic removal. The risk of damaging your natural nails is simply too high. For most people, sticking to the acetone soak method is a much safer and more reliable way to get those acrylics off without causing harm. Your nails will thank you for that cautious approach, you know, for sure.
Common Mistakes to Avoid
When you're learning how to remove acrylic nails at home, knowing what not to do is, you know, almost as important as knowing what to do. There are several common mistakes that people make, and these can unfortunately lead to damaged natural nails, pain, or even infections. Avoiding these pitfalls will help ensure a much smoother and safer removal process, which is pretty important, actually.
One of the biggest mistakes is trying to peel, pick, or forcefully pull off the acrylics. This is a huge no-no, as it almost always rips off layers of your natural nail along with the acrylic. Your natural nails can become very thin, weak, and brittle, taking a long time to recover. Patience is key; if the acrylic isn't coming off easily, it needs more soaking time, you know.
Another common error is not protecting your skin around the nail beds from the acetone. As we discussed, acetone is very drying, and direct prolonged contact can cause irritation, redness, and excessive dryness. Skipping the petroleum jelly step can leave your skin feeling pretty uncomfortable. Also, using anything less than 100% acetone might not be effective enough, leading to frustration and a longer removal time, you know. Make sure you're using the right stuff.
Not filing down the topcoat enough is also a mistake. If the top layer isn't properly abraded, the acetone can't penetrate the acrylic effectively, meaning it will take much longer to soften. Lastly, rushing the process is, you know, a recipe for disaster. Allow adequate soaking time, and be gentle with your nails throughout. Taking your time ensures a much better outcome for your nail health, for sure.
Frequently Asked Questions About Acrylic Nail Removal
Many people have questions about how to remove acrylic nails, especially when they're trying it at home for the first time. We’ve gathered some of the most common inquiries to help clear things up and make you feel more confident about the process. It’s totally normal to have concerns, and getting good answers can make a big difference, you know.
These questions often come up because people want to ensure they're doing things the right way and protecting their natural nails. Understanding the answers can help you avoid mistakes and feel more prepared. So, let's look at some of those common thoughts and get you some helpful information, actually.
If you're wondering about the safety, the time it takes, or alternative products, you're not alone. We'll tackle these points to give you a clearer picture of what to expect and how to handle different situations. It’s all about making the process as easy and stress-free as possible for you, you know.
Is it bad to remove acrylic nails at home?
It's not inherently bad to remove acrylic nails at home, but it's, you know, very important to do it correctly. The key is to follow safe, expert-recommended methods and avoid rushing or forcing the process. Many experts agree that with the right tools and techniques, you can remove acrylics without damaging your natural nails, which is pretty good news, actually.
The problems usually arise when people try to peel, chip, or rip off the acrylics, or use harsh tools improperly. This can lead to thinning, weakening, and even pain for your natural nails. However, if you stick to methods like the acetone soak and are patient and gentle, then removing them at home can be a perfectly safe and effective option, you know, saving you a trip to the salon.
So, the answer really depends on your approach. With care and the right knowledge, you can absolutely achieve a safe removal at home. It’s about being informed and taking your time, you know, to protect your nails.
How long does it take to remove acrylic nails with acetone?
The time it takes to remove acrylic nails with acetone can vary a bit, you know, but typically you're looking at about 30 to 60 minutes for the whole process. This includes the preparation, the soaking time, and the gentle removal. The actual soaking period itself usually requires at least 20-30 minutes for the acrylic to soften properly, which is pretty important, actually.
Sometimes, if your acrylics are very thick or if you have multiple layers, they might need a longer soak. You might find yourself re-soaking some nails for an additional 10-15 minutes if they're not coming off easily. It's really important not to rush this part; patience is key to preventing damage to your natural nails. So, plan for a little bit of time, you know, to get it done right.
Think
- What Is A Femboy
- Help I Accidentally Summoned Mahoraga
- Kay And Tay Abuse Allegations
- Tun Tun Tun Sahur
- 16 Guard Buzz Cut
3 Methods to Remove Acrylic Nails Without Damaging Your Nails
How to Remove Acrylic Nails at Home

3 Ways to Remove Acrylic Nails - wikiHow
