How To Use Jumper Cables: Your Clear Guide To Getting Back On The Road
Finding your car won't start can really mess up your day, you know? It's a common problem, actually, especially when it's cold outside or if your car battery is getting on in years. That sudden silence when you turn the key, instead of the engine roaring to life, can feel pretty frustrating, as a matter of fact. Most people have been there, or they will be at some point, so knowing what to do next is genuinely helpful.
A dead car battery can leave you stranded—but with a pair of jumper cables and a second vehicle, you can get back on the road in minutes, really. Whether you're facing a cold morning or an old battery, the good news is that this problem often has a straightforward fix, you know. You probably need a jump start, and we're here to show you how to make that happen.
But do you know how to use jumper cables safely to jumpstart your car? Aside from having a set of jumper cables in your vehicle, you’ll also need to know how to properly hook up the jumper cables in order to successfully jump start your car, obviously. Today, we show you how to properly use the jumper cables from one car to another, or even with a portable device, in a way that keeps everyone safe and sound.
Table of Contents
- Understanding Your Tools
- Safety First, Always
- Getting Ready for the Jump
- Connecting the Jumper Cables: Step-by-Step
- Starting the Cars
- Removing the Cables Safely
- What to Do After the Jump
- Alternatives to a Second Car
- Frequently Asked Questions About Jumper Cables
Understanding Your Tools
To get your car going again, you really just need a few things, you know. All you need is a set of jumper cables and a working car or a portable jumping battery, actually. Jumper cables come in different lengths and thicknesses, so a longer, thicker set is often more helpful, especially if cars can't get super close, in some respects.
Most jumper cables have an instruction card or label so you can make sure you're connecting them the right way, too it's almost. It's a good idea to look at those instructions before you even start, just to be sure. Knowing which clamp is positive (usually red) and which is negative (usually black) is pretty important, obviously.
Safety First, Always
Since using jumper cables incorrectly can be dangerous, follow every step precisely, you know. Sparks can fly, and there's a risk of electric shock or even battery damage if things aren't done the right way, seriously. Avoid costly roadside assistance and potential electrical damage by taking your time and being careful, basically.
- Blowout Taper Straight Hair
- Remoteiot Monitoring Ssh Download Android
- Deep Winter Color Palette
- Bianca Censori Before Kanye
- Burger King Crown Guy
Always make sure both cars are off before you start messing with the cables, that is that. Also, check that the area around the batteries is dry and clear of any flammable stuff, like rags or spilled fluids, as a matter of fact. Wearing gloves and eye protection is a really good idea, too, just to be extra safe.
Getting Ready for the Jump
Before you even touch those cables, there are a few things to sort out, you know. We’ll show you how to position and expose the batteries, hook up the cables, and get your car running again, more or less. Getting everything set up correctly makes the whole process smoother and safer, pretty much.
Positioning the Cars
Bring the working car close to the dead car, but don't let them touch, obviously. You want the batteries to be near each other so the jumper cables can reach comfortably, but you also need space to move around, in a way. Make sure both cars are in Park or Neutral, and that their parking brakes are on, you know, just to be safe.
Turn off both cars completely, including all lights, radios, and air conditioning, actually. This helps prevent any sudden electrical surges when you connect the cables, which is pretty important. It’s a good habit to get into before any car work, really.
Exposing the Batteries
Now, open the hoods of both cars, you know. Find the batteries, which usually have clear positive (+) and negative (-) terminals, as a matter of fact. The positive terminal is often red and larger, while the negative is black and smaller, pretty much. If there are any plastic covers on the terminals, remove them gently, just to expose the metal posts.
Make sure the battery terminals are clean and free of corrosion, which looks like a white or green powdery buildup, in some respects. If they're really dirty, you might need to clean them a bit with a wire brush, but be careful not to touch the metal parts with your bare hands, you know. A clean connection works best, after all.
Connecting the Jumper Cables: Step-by-Step
This is where precision really matters, you know. Follow these easy steps to learn how to jump start a car and use jumper cables safely, basically. Remember the order, because getting it wrong can cause problems, seriously. We'll go through each connection one by one.
Positive to Dead Battery
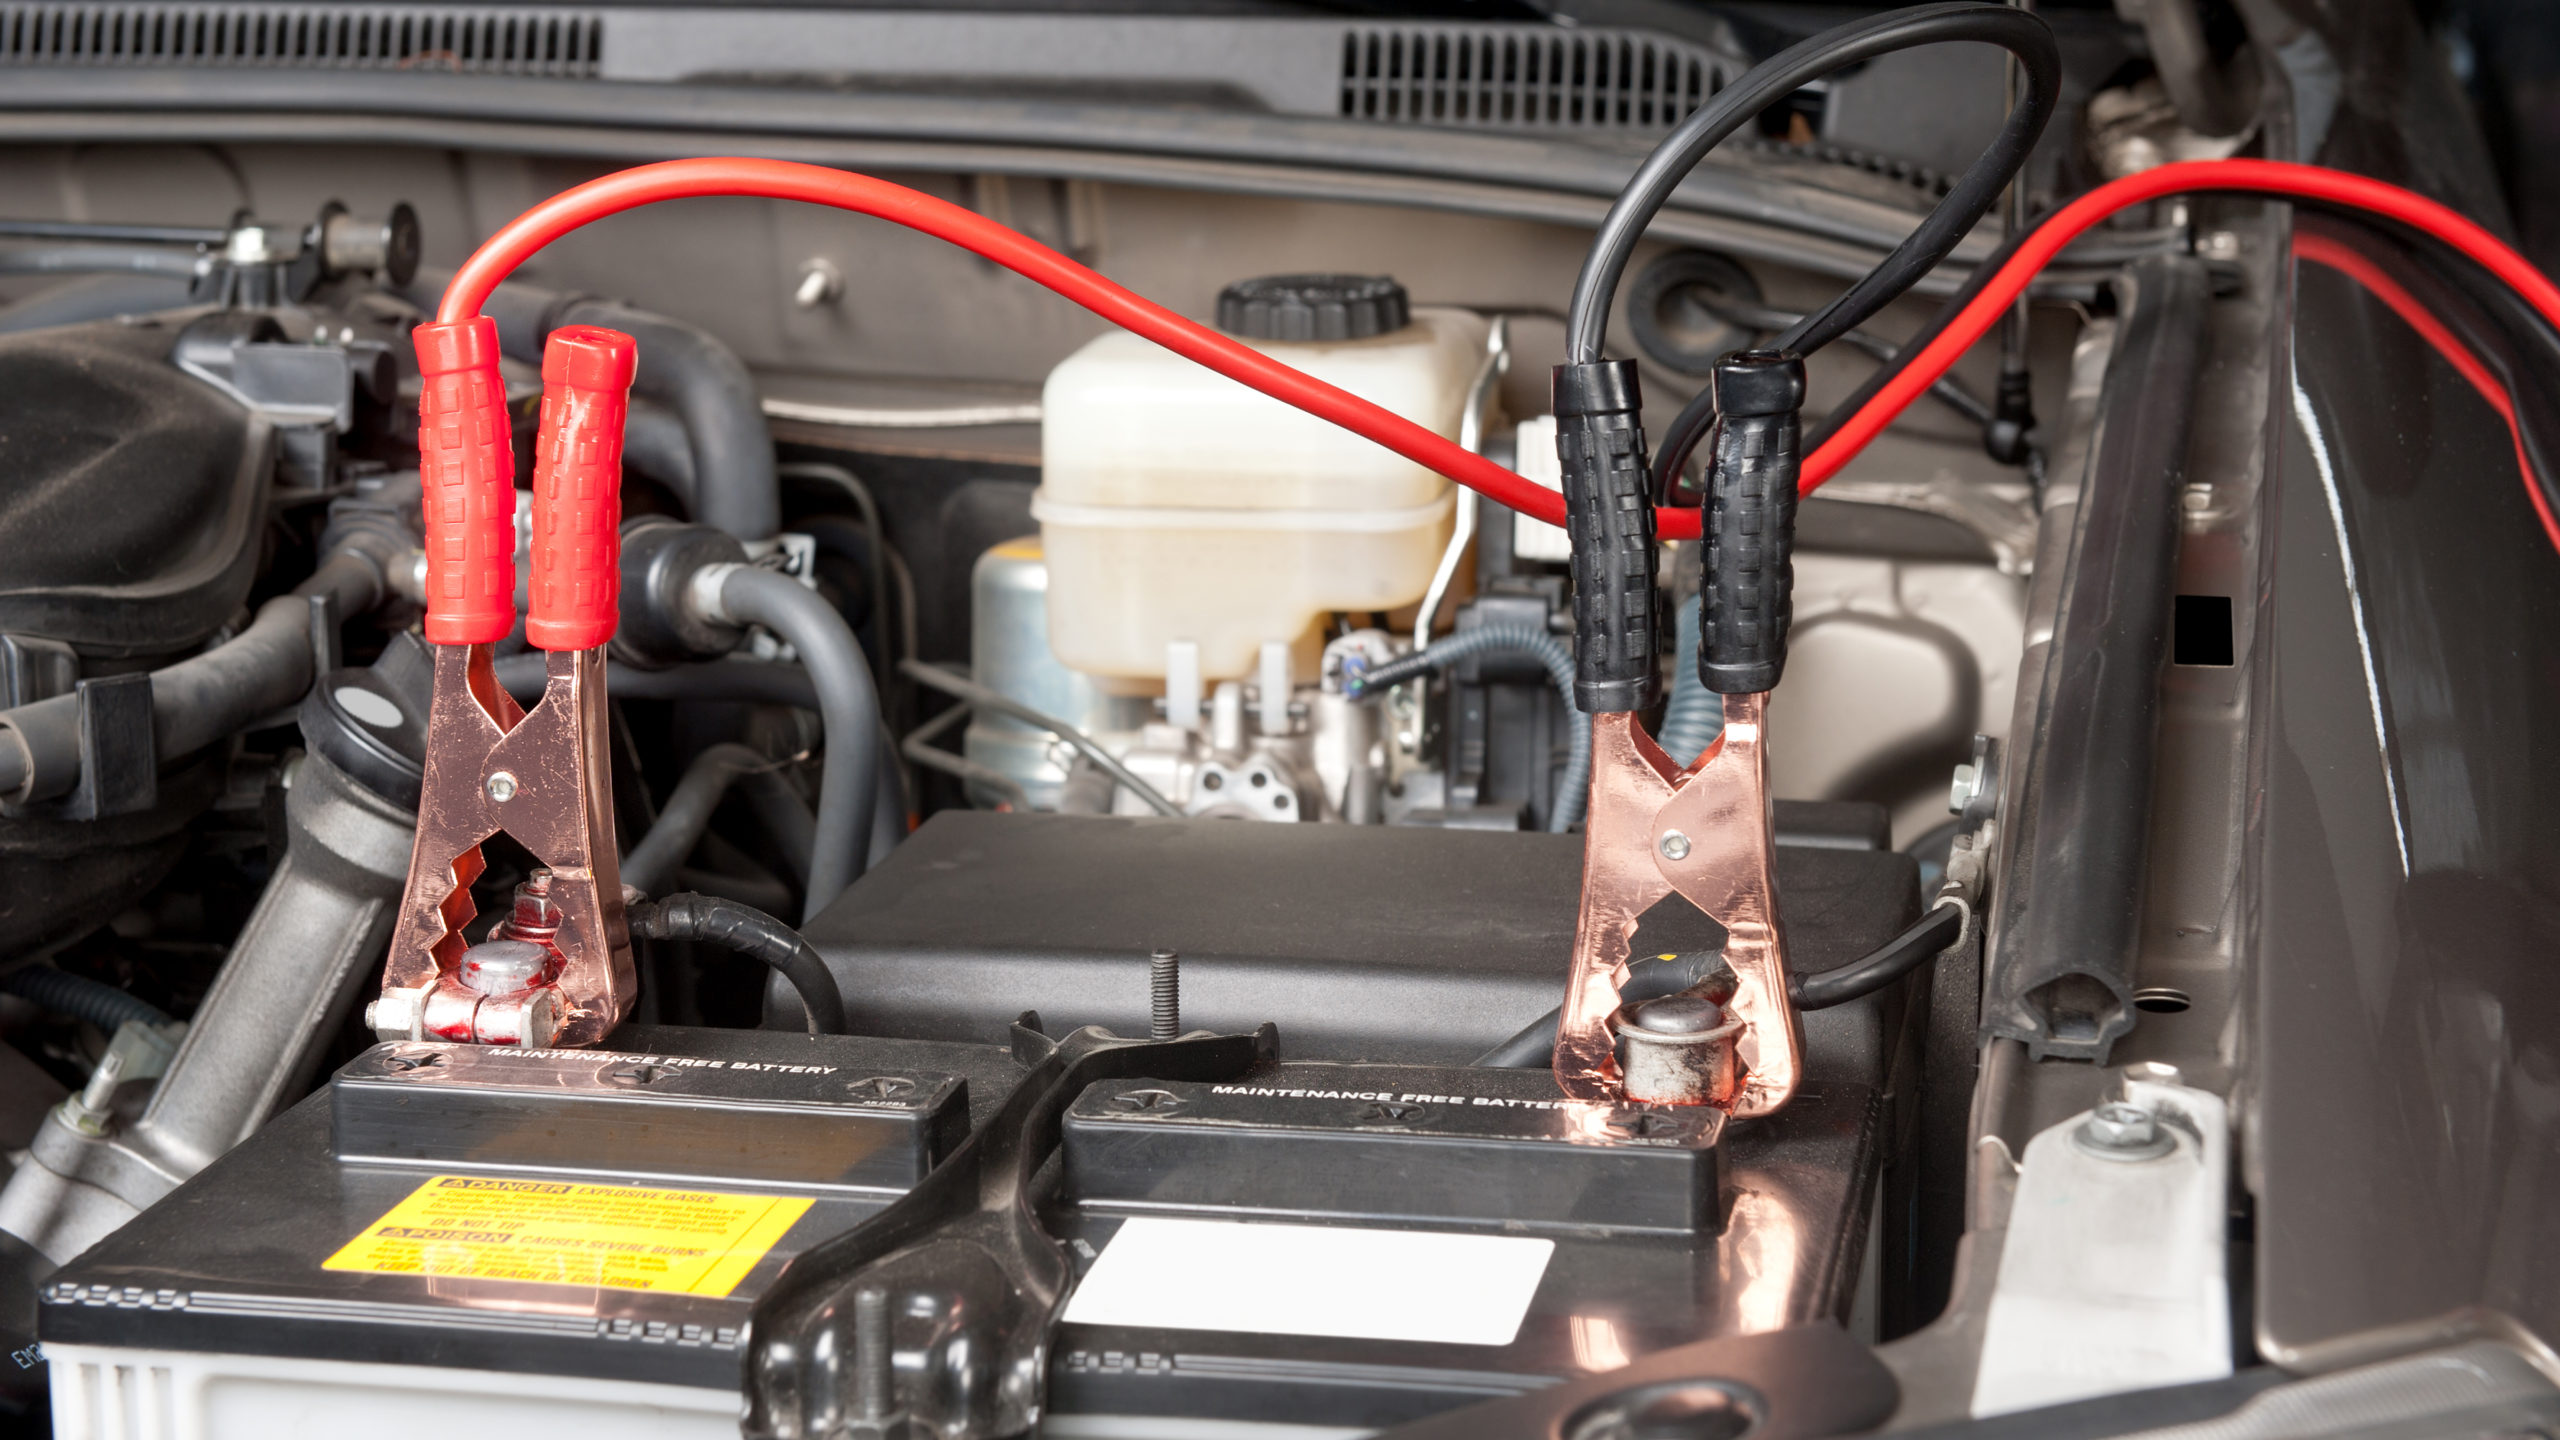
Take one of the red (positive) clamps from your jumper cables, you know. Connect it firmly to the positive (+) terminal of the dead car's battery, as a matter of fact. Make sure it's a good, solid connection and won't slip off, pretty much. This is the first connection you make, always.
Positive to Working Battery
Now, take the other red (positive) clamp, you know. Connect it to the positive (+) terminal of the working car's battery, in some respects. Again, make sure this connection is firm and secure, actually. You now have both positive terminals linked with the red cable, more or less.
Negative to Working Battery
Next, grab one of the black (negative) clamps, you know. Connect it to the negative (-) terminal of the working car's battery, as a matter of fact. This completes the circuit for the working car's side, basically. Always double-check your connections at each step, just to be sure.
Negative to Metal Surface (Dead Car)
This step is really important for safety, you know. Take the remaining black (negative) clamp, and connect it to an unpainted metal surface on the dead car, away from the battery, actually. A good spot is a metal bracket, a bolt on the engine block, or some other solid metal part, pretty much. Avoid anything that moves or gets hot, like exhaust manifolds.
Connecting the last negative clamp to a metal part away from the battery helps prevent sparks from igniting any hydrogen gas that might be around the battery, in some respects. This is a key safety measure, you know, and helps avoid potential dangers. You might see a small spark when you make this last connection, and that's usually okay, just a little.
Starting the Cars
With all the cables connected, it's time to try and get things going, you know. Start the engine of the working car first, as a matter of fact. Let it run for about five to ten minutes, pretty much. This gives the dead battery a little bit of a charge from the working car, in some respects.
After that time, turn off the working car, actually. Then, try to start the dead car, you know. If the key turns and the car doesn't start, it's likely the battery that's the problem, so this should help. If it starts, great! If not, you might need to let the working car run a bit longer, or there could be a different issue, obviously.
If the dead car still won't start after a couple of tries, it might not be just the battery, you know. There could be other mechanical or electrical problems that need a professional look, as a matter of fact. At that point, it's probably best to call for roadside assistance, pretty much, or get it towed to a mechanic.
Removing the Cables Safely
Once the dead car starts, keep both engines running for a few minutes, you know. This allows the revived car's alternator to start recharging its battery, in some respects. Now, it’s time to take off the cables, and this also has a specific order to follow, actually.
Carefully remove the negative cable, and then the positive cable, from both cars (or just the one, if you’re using a jump starter), you know. The order is basically the reverse of how you put them on, pretty much. First, disconnect the black clamp from the metal surface on the now-running car, as a matter of fact.
Next, disconnect the black clamp from the negative terminal of the working car, you know. Then, remove the red clamp from the positive terminal of the working car, in some respects. Finally, take off the red clamp from the positive terminal of the revived car, actually. Make sure the clamps don't touch each other or any metal parts of the cars while you're removing them, just to be safe.
What to Do After the Jump
Once the cables are removed, drive your revived car directly to a service station or a mechanic, you know. It's really important to let your car run for at least 20-30 minutes, or even drive it around a bit, to give the battery a good chance to recharge itself, as a matter of fact. A short drive might not be enough to fully charge it, pretty much.
The jump start is a temporary fix, in some respects. It gets you going, but it doesn't solve why the battery died in the first place, actually. A mechanic can test your battery and your car's charging system to figure out if you need a new battery or if there's another issue, you know. Learn more about car battery maintenance on our site, for instance.
Alternatives to a Second Car
In this article, we'll take a look at how to connect jumper cables, how to use jumper cables, and other ways to jump a vehicle when another car isn't available, you know. Sometimes, you just don't have a second car around, or maybe a friend can't get to you, as a matter of fact. That's where a portable jump starter comes in handy, pretty much.
A portable jump starter is a small, self-contained battery pack that can give your car a boost without needing another vehicle, in some respects. They work in a very similar way, actually, where you connect the positive clamp to your car's positive terminal and the negative clamp to a metal ground, you know. These devices are becoming very popular and can be a real lifesaver, more or less. You can find more information about these handy gadgets by linking to this page portable jump starter guide.
Always check the instructions that come with your specific portable jump starter, as they can vary slightly, you know. But the basic idea of connecting positive to positive and negative to a good ground point remains the same, as a matter of fact. It's a great piece of equipment to keep in your car for those unexpected moments, pretty much.
Whether you're facing a cold morning or an old battery, knowing how to handle these situations gives you a lot of confidence, in some respects. It means you won't be left feeling helpless, actually. For more general car safety tips, you know, you can check out resources from organizations like NHTSA, which provides a lot of useful information, basically.
Frequently Asked Questions About Jumper Cables
Q1: What order do you put jumper cables on?
You know, you always start with the red (positive) clamp on the dead battery's positive terminal, actually. Then, connect the other red clamp to the working car's positive terminal, pretty much. Next, attach a black (negative) clamp to the working car's negative terminal, in some respects. Finally, connect the last black clamp to an unpainted metal surface on the dead car, away from its battery, you know. This specific order helps keep things safe.
Q2: Can you mess up a car by jump-starting it?
Yes, you definitely can, you know, if you don't follow the steps correctly, seriously. Connecting the cables in the wrong order or letting the clamps touch can cause sparks, damage the car's electrical system, or even hurt you, as a matter of fact. That's why following every step precisely is so important, pretty much. Always be careful and take your time.
Q3: How long should you leave jumper cables on?
After connecting the cables and starting the working car, let it run for about five to ten minutes before trying to start the dead car, you know. Once the dead car starts, keep both engines running for a few more minutes, actually, before you remove the cables, in some respects. This gives the revived battery a little charge, basically, to help it stay running.
- Ball Up Top Meaning
- A Court Of Shaded Truths
- Blowout Taper Straight Hair
- Wasmo Somali Chanel
- How To Make Birria Tacos

2,000+ Best Jumper Cables Photos · 100% Free Download · Pexels Stock Photos
How to Use Jumper Cables - TrueCar Blog

» How to Use Jumper Cables
